

Monday, September 2, 2013
Hardtop Paint Is A Match!
You cannot begin to imagine the weight that lifted from my shoulders when I saw the top and the car together....

Saturday, August 31, 2013
Factory Hardtop Restoration
Dug in deeper on the hard top restoration for my TR. I've owned this top for about 20 years. When I bought it originally, my uncle, father and I slapped some matching lacquer on it and I used it. Weather took its toll however and it eventually looked horrible.
Today was finally a day to lay the paint. I shot Nason 2k primer on the original white paint (prepped with 220). Over the top went Dupont ChromaBase basecoat, matched by the Dupont computer. Finally, I shot Nason clearcoat over the basecoat for a nice shine.
I'm leaving it to cure for 3 days before I move it or touch it. That should ensure a long lasting shine.


Thursday, August 22, 2013

Tuesday, August 20, 2013
Triumph TR6 Factory Hardtop
One of the great accessories I added to my TR6 many years ago was a hard top. The TR6 is known as a flexy flyer because of its very flexible frame. The hardtop significantly stiffens up the entire chassis because of how it attaches and the fact that it was made for the car in steel instead of the more common fiberglass (which would add no rigidity).
My father and I found mine through the 6-Pack classified adds which were previously posted in the printed club newsletter. A trip to Indiana or Ohio yielded a white factory hardtop in usable shape. I should mention that this was 20 years ago. We painted that top to match the BRG paint on my car. You can see it laying in the background of this photo from a 2001 autocross.

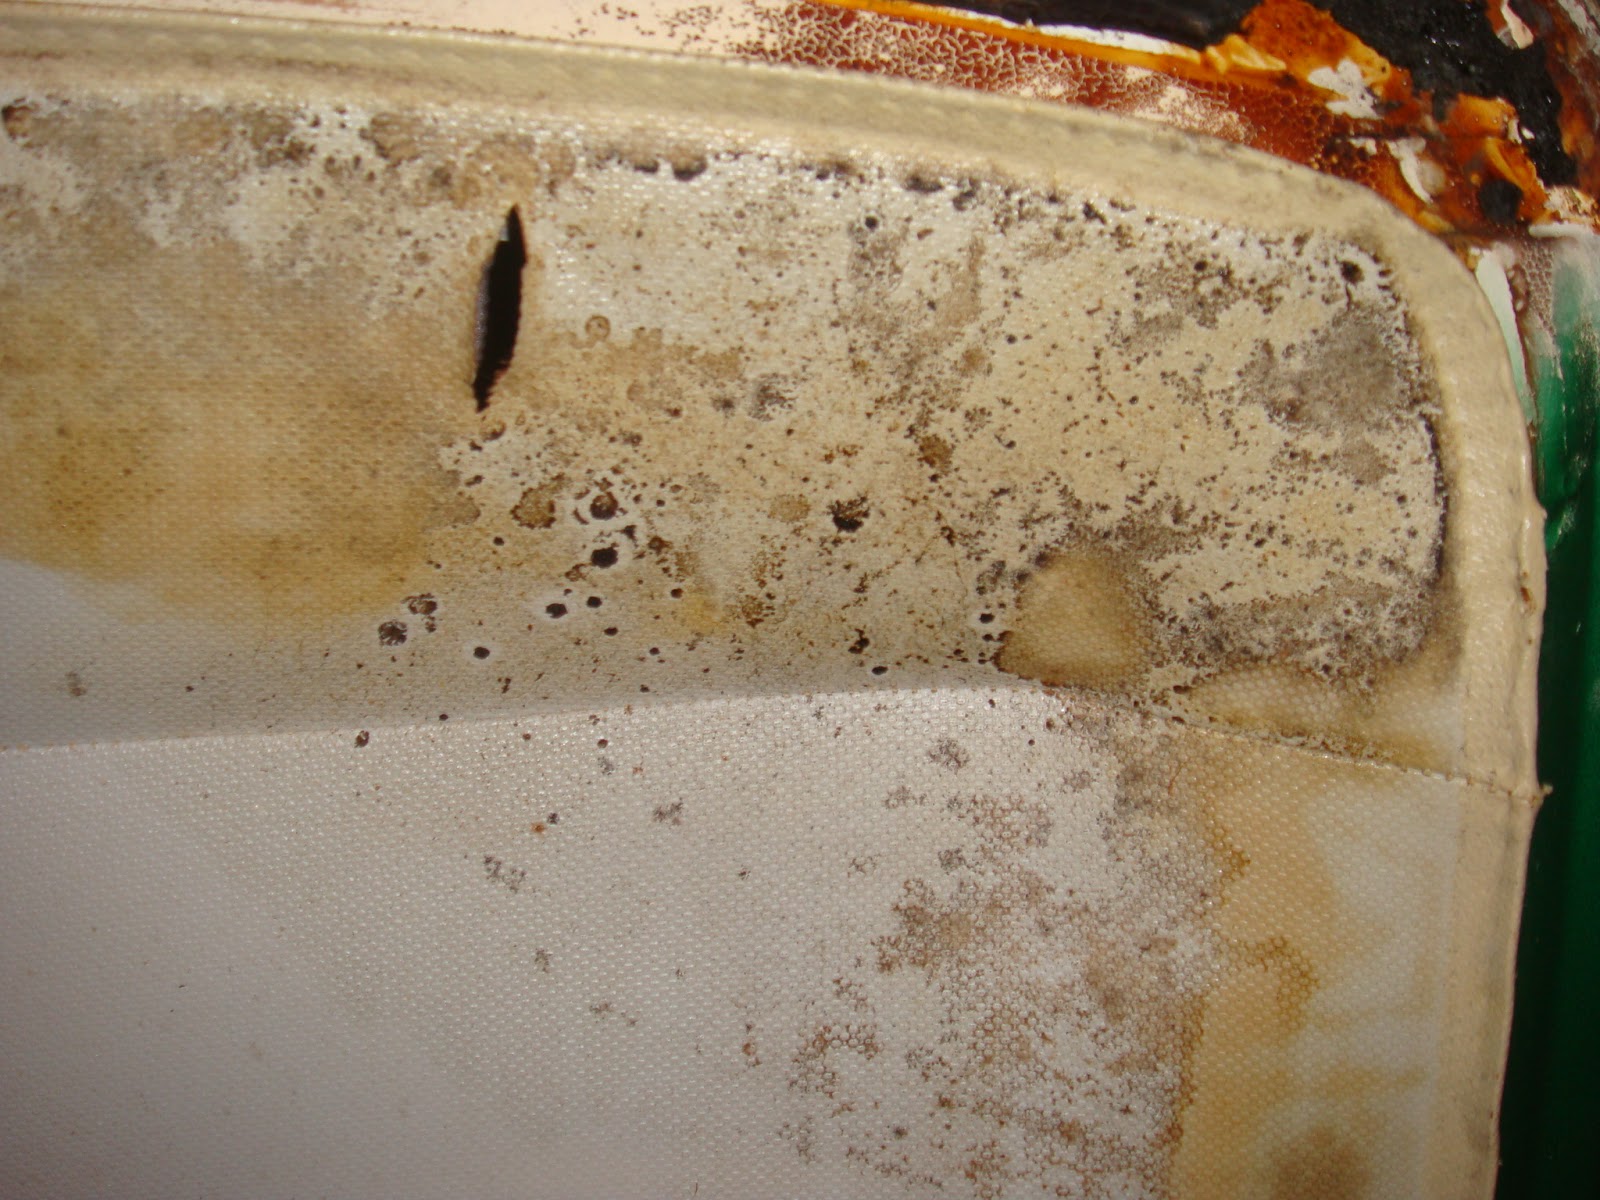
This year, I decided to undertake a full restoration of my hardtop. The years had not been kind to it. Rust had crept into many different areas, and the rubber seals and headliner were simply shot. The paint itself (a quickly done splash of lacquer) was faded, flat and showed cracking all over.
I stripped the top in the late spring and worked each weekend this summer on stripping the paint back, while also remediating the rust. It was messy work...


After completing the teardown task, I had my first opportunity to spray some paint. I primed the top in my driveway (still using full protective gear) and got her ready to go. It now needs basecoat and clear to begin looking like a top again. I've also managed to find all the soft bits (seals and headliner) on sale throughout the year, so I can complete the top after the paint cures. I'd really like it to be ready for this fall.


My father and I found mine through the 6-Pack classified adds which were previously posted in the printed club newsletter. A trip to Indiana or Ohio yielded a white factory hardtop in usable shape. I should mention that this was 20 years ago. We painted that top to match the BRG paint on my car. You can see it laying in the background of this photo from a 2001 autocross.

This year, I decided to undertake a full restoration of my hardtop. The years had not been kind to it. Rust had crept into many different areas, and the rubber seals and headliner were simply shot. The paint itself (a quickly done splash of lacquer) was faded, flat and showed cracking all over.
I stripped the top in the late spring and worked each weekend this summer on stripping the paint back, while also remediating the rust. It was messy work...


After completing the teardown task, I had my first opportunity to spray some paint. I primed the top in my driveway (still using full protective gear) and got her ready to go. It now needs basecoat and clear to begin looking like a top again. I've also managed to find all the soft bits (seals and headliner) on sale throughout the year, so I can complete the top after the paint cures. I'd really like it to be ready for this fall.


Third Brake Light
Little British Cars are by definition 'Little'. So while driving around the highways and byways amongst jacked up pickup trucks and soccer moms in their Expeditions and Suburbans, being seen is always a priority.
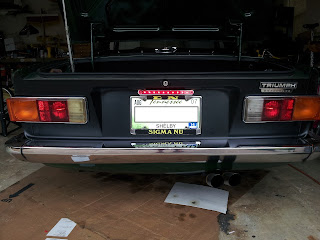
To that end, I decided I wanted a third brake light on my car. I search high and low for just the right one and then came across a nice one while I was at 'The Mitty' this past spring. My friend Jeff G. had a nice license plate frame mounted brake light. I could not help but see it while I was there, and I decided I needed one.
I eventually found what I needed on Amazon.com.
Here are the installation pics. I wired it into the car through the license plate illumination holes, and used piggyback connectors to connect it to the light connectors on the driver's side lights.
The results are great. Its very bright and very hard to miss.


Tuesday, July 30, 2013
TR6 Differential Mounts
There are a few givens with Triumph TR6's.
You'll have fun in them!
People will compliment them when you are out driving them.
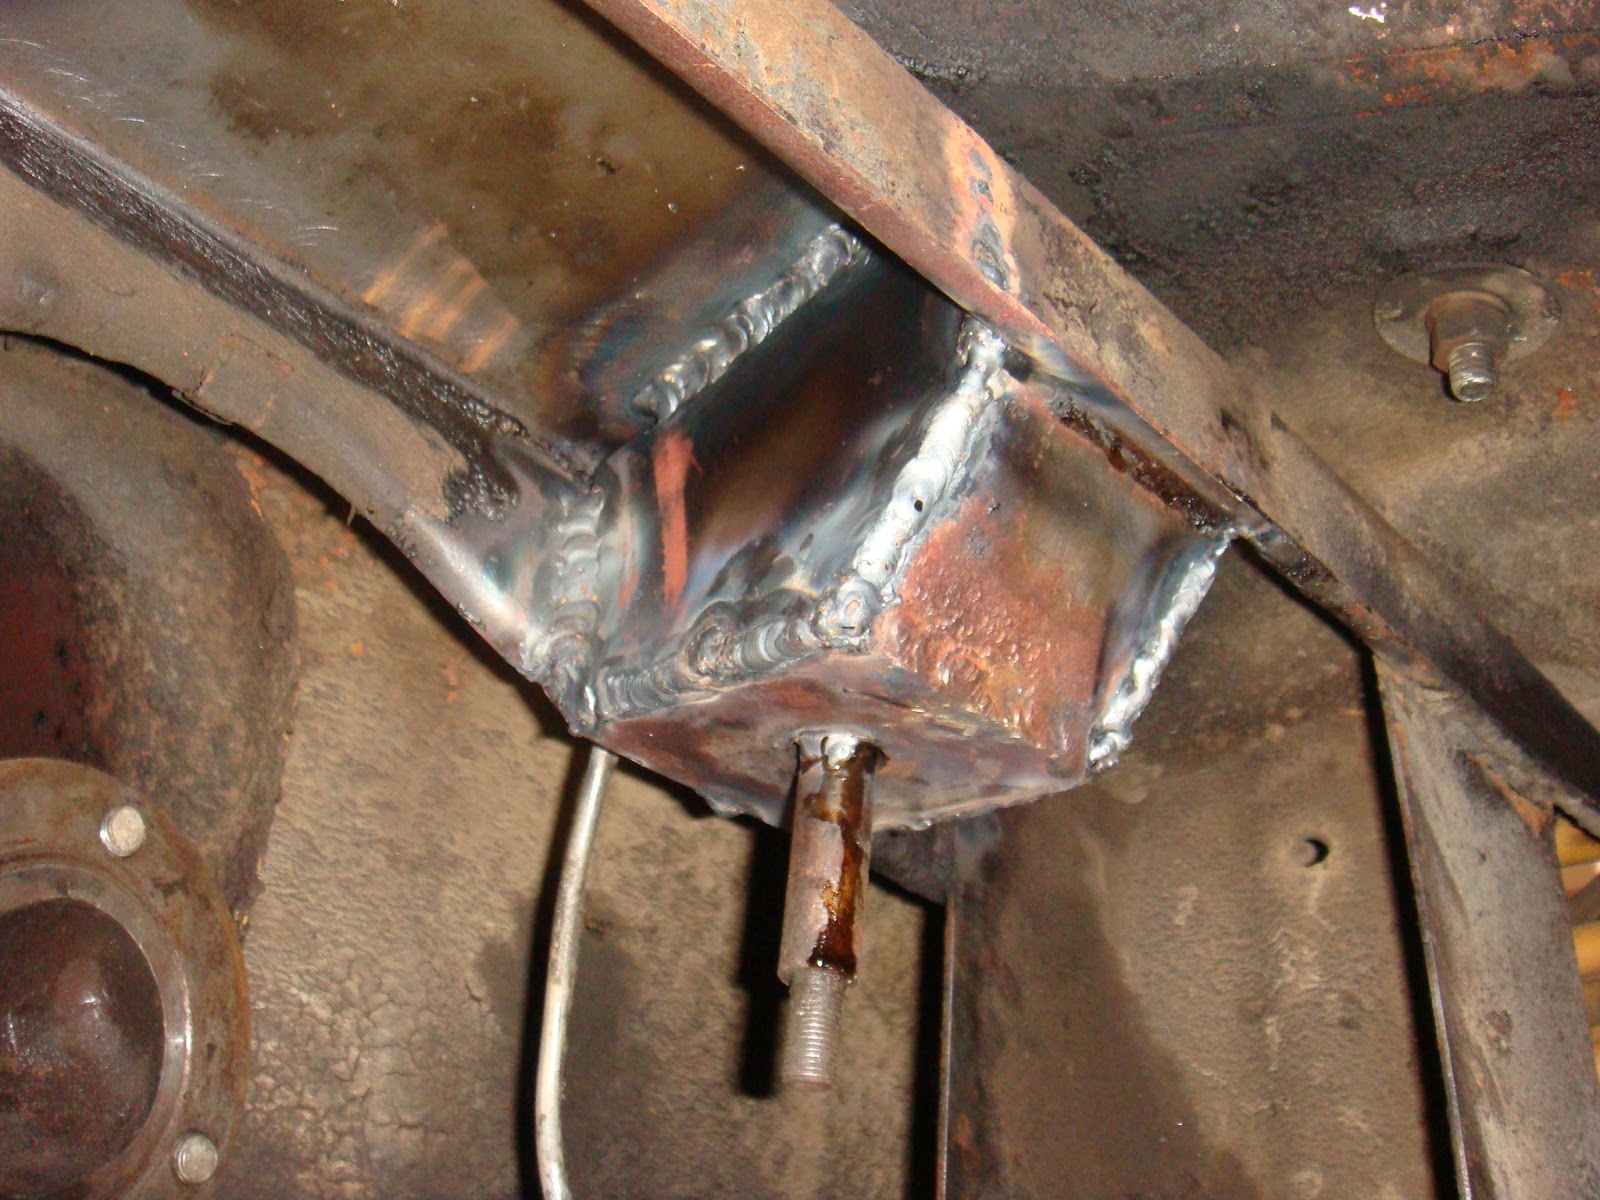
The differential mount will eventually break!
I recently undertook the process of dropping the differential and reinforcing the mounts. My good buddy Boris happens to be a vintage car nut and a good welder. Without his help, this would have never happened.
When we dropped the differential, we found that my mounts were broken, and they had actually been broken at least once before. The car is 40 years old, and I've owned it for 23 of those years, so somewhere along the line she broke.
I did all the mechanical work, all the reinforcement plate fabrication and all the cleanup to ensure the welding would go well. Boris did all of the welding. Believe me, he had the toughest job by far. He did a brilliant job of welding over his head in very cramped quarters.
I'm pleased with the end results. The back end of the car is more solid and the clunk caused by the cracked passenger side front mount is now gone. Thank goodness! (and Boris)


You'll have fun in them!
People will compliment them when you are out driving them.
The differential mount will eventually break!
I recently undertook the process of dropping the differential and reinforcing the mounts. My good buddy Boris happens to be a vintage car nut and a good welder. Without his help, this would have never happened.
When we dropped the differential, we found that my mounts were broken, and they had actually been broken at least once before. The car is 40 years old, and I've owned it for 23 of those years, so somewhere along the line she broke.
I did all the mechanical work, all the reinforcement plate fabrication and all the cleanup to ensure the welding would go well. Boris did all of the welding. Believe me, he had the toughest job by far. He did a brilliant job of welding over his head in very cramped quarters.
I'm pleased with the end results. The back end of the car is more solid and the clunk caused by the cracked passenger side front mount is now gone. Thank goodness! (and Boris)


Saturday, February 9, 2013
Comfy New Interior
When I originally restored my '73 TR6 back in 1990, I installed with my father a brand new 'biscuit' interior. We did every detail. My father was the guy with the patience to get it done right, and we farmed out the seat reupholstery to a local shop. In the end, it looked great!

I found a couple very good how-to's on the website. One on Victoria British Limited, and one on the Buckeye Triumphs website. If you've not been to the Buckeye site, you really need to visit it as it is well worth the read.
I won't tell you every boring detail of the job, but there are some valuable details in the installation that I learned and think everyone could benefit from.
Before doing any installation, I derusted the seat frames, painted with rust protectant paint and finished with some gloss black for more protection.

Next up, when you reupholster the seats, you don't necessarily have to replace all the foam. I found that the seat back foam in my seats was perfect. The seat cushion foam bolsters were also good, but the base foam was dead. I replaced this with high density foam from Jo Ann. When you install this foam, cut the pieces oversize. Install them with plenty of adhesive and when the adhesive is dry, take the time to cut the pieces to size.
What should you use to cut the foam? I used an electric fish filleting knife from Wal-mart. Total investment was $25, but it was worth it. When you cut with the knife, just place the blade where you want it and hit the button. Guide the knife through, but don't force it. Let the blades work their way through and you'll be pleased with the results.
I also took the time to install new fabric along the edges of the seats and over the seat springs. This protects the foam from the springs, and gives the side foams something to adhere to.


Once you have the foams all glued in place and trimmed, its time to pull the cushions on. My only advice here is to take your time and think the job through completely before you begin. Think how you will pull each piece into place and have your clips ready at hand to secure everything. I did find that installing the seat bottom cover is much easier with the seat fully reclined.
On the seatback cover, there are two formers which are mounted in pockets in the bottom of the seat edges. They provide shape and with two metal clips, they secure the seat cover on the seat.
I originally installed these as stock into my car. The first time I sat down, the former poked me in the leg and nearly punctured the vinyl. I figured out quickly what the problem was and dissassembled the seat cover. I modified the formers as shown in the pictures. I also sanded all the edges of the formers round with some 100 grit sandpaper. This completely eliminated the problem.


When I was done with this job, I was really pleased with the results and I think this pic shows why!


Unfortunately, time, weather and wear took their toll on my beautiful car. The end result was faded, cracked, torn and worn seats and carpet which literally disintegrated. I can't fault it much, as those repro parts lasted 15 years!
As I've gotten the car back on the road, I could not stand to see the torn up seats and they were not terribly comfortable. So, it was time to restore the seats.
I decided to reupholster my seats myself this time instead of having anyone in town do it. Mostly this was motivated by the one quote I got which was for more than the seat cover kits cost. Too much dollar value out of my pocket. I found a couple very good how-to's on the website. One on Victoria British Limited, and one on the Buckeye Triumphs website. If you've not been to the Buckeye site, you really need to visit it as it is well worth the read.
I won't tell you every boring detail of the job, but there are some valuable details in the installation that I learned and think everyone could benefit from.
Before doing any installation, I derusted the seat frames, painted with rust protectant paint and finished with some gloss black for more protection.
The restored headrest with rust removed, painted and new wood
in the lower edge for fastening the headrest cover.

Next up, when you reupholster the seats, you don't necessarily have to replace all the foam. I found that the seat back foam in my seats was perfect. The seat cushion foam bolsters were also good, but the base foam was dead. I replaced this with high density foam from Jo Ann. When you install this foam, cut the pieces oversize. Install them with plenty of adhesive and when the adhesive is dry, take the time to cut the pieces to size.
What should you use to cut the foam? I used an electric fish filleting knife from Wal-mart. Total investment was $25, but it was worth it. When you cut with the knife, just place the blade where you want it and hit the button. Guide the knife through, but don't force it. Let the blades work their way through and you'll be pleased with the results.
I also took the time to install new fabric along the edges of the seats and over the seat springs. This protects the foam from the springs, and gives the side foams something to adhere to.
Seat top in place and side fabric support installed.

Side foams glued

Side foams trimmed and seat cushion trimmed.

Once you have the foams all glued in place and trimmed, its time to pull the cushions on. My only advice here is to take your time and think the job through completely before you begin. Think how you will pull each piece into place and have your clips ready at hand to secure everything. I did find that installing the seat bottom cover is much easier with the seat fully reclined.
On the seatback cover, there are two formers which are mounted in pockets in the bottom of the seat edges. They provide shape and with two metal clips, they secure the seat cover on the seat.
I originally installed these as stock into my car. The first time I sat down, the former poked me in the leg and nearly punctured the vinyl. I figured out quickly what the problem was and dissassembled the seat cover. I modified the formers as shown in the pictures. I also sanded all the edges of the formers round with some 100 grit sandpaper. This completely eliminated the problem.
The former before cutting with the cut marked on the former.

The former after cutting and ready to install.

When I was done with this job, I was really pleased with the results and I think this pic shows why!

Wednesday, January 9, 2013
Back On The Road!
Well, Coventry's Finest is back on the road!
That last run of work was not a small one, but the car is in significantly better shape than when it entered that phase. I finally resolved the brake issue when I found that the new caliper pistons I installed were actually slightly out of round and were locking up in the calipers. Before getting all that right however, I had also rebuilt the master cylinder.
In the process of rebuilding the brake master cylinder, I found that the clutch master cylinder was completely blown. It still operated, but it was leaking heavily. The rebuild on it was quick, but I found that the cylinder casting was completely shot. I ended up using an old Girling casting which was in perfect shape. I used several other parts from the old cylinder, including the piston.
So, here is the latest list:
Rebuilt Rear Hubs - rebuilt by Phil (all other items rebuilt by myself)
New Outer Universal Joints
Rebuilt Front Hubs
Rebuilt Front Brake calipers (new seals, new stainless pistons)
Rebuilt Brake Master Cylinder
Rebuilt Clutch Master Cylinder
Refinished Tail Light Assemblies
Repainted Kamm Tail
Rear Bumper rustproofed inside and painted inside
New Interior Visors
New Bullet Door Mirror
Seats Reupholstered
Differential Oil Topped Up
All Rock Pecks Touched Up
It feels great to have it back on the road again!
Subscribe to:
Posts (Atom)