Well, Coventry's Finest is back on the road!
That last run of work was not a small one, but the car is in significantly better shape than when it entered that phase. I finally resolved the brake issue when I found that the new caliper pistons I installed were actually slightly out of round and were locking up in the calipers. Before getting all that right however, I had also rebuilt the master cylinder.
In the process of rebuilding the brake master cylinder, I found that the clutch master cylinder was completely blown. It still operated, but it was leaking heavily. The rebuild on it was quick, but I found that the cylinder casting was completely shot. I ended up using an old Girling casting which was in perfect shape. I used several other parts from the old cylinder, including the piston.
So, here is the latest list:
Rebuilt Rear Hubs - rebuilt by Phil (all other items rebuilt by myself)
New Outer Universal Joints
Rebuilt Front Hubs
Rebuilt Front Brake calipers (new seals, new stainless pistons)
Rebuilt Brake Master Cylinder
Rebuilt Clutch Master Cylinder
Refinished Tail Light Assemblies
Repainted Kamm Tail
Rear Bumper rustproofed inside and painted inside
New Interior Visors
New Bullet Door Mirror
Seats Reupholstered
Differential Oil Topped Up
All Rock Pecks Touched Up
It feels great to have it back on the road again!

Wednesday, January 9, 2013
Thursday, December 27, 2012
New Bearings
So while I was testing out the new cooling system, I found that the rear hubs were giving up the ghost. To that end, I decided to send them off to a 6-Pack member - Phil. I cannot say enough great things about Phil and the work he does. He rebuilt the hubs and turned them around quickly. I've now driven the car and the rear hubs are absolutely perfect!
With the car up on stands, I took the time to rebuild the front hubs as well. The front races turned out to be in terrible shape. They were smooth, but worn down so badly that we had put a washer under the stock 'D' washer to allow to take up the slack.
I put the new bearings in the front and the result is great. Slop free bearings, nicely set up and ready to rock!
As with everything however, as I was rebuilding the front hubs, I had removed the brake calipers and was inspecting them. I found a small leak from one of the calipers. Since I had the rebuild kits, I decided to rebuild them. Smart thing to do right?
Wrong..... I rebuilt the calipers and reinstalled them and quickly found I could not bleed them out correctly.
As of right now, I have a car in great running shape with a great looking interior, but I cannot drive it. My father will be here this weekend and we'll take a few mins to try to bleed it out correctly.
Thursday, December 20, 2012
Cooling System Complete
After fixing the radiator and re-installing it, I was able to finish out the installation of the electric fan harness and complete the cooling system re-do.
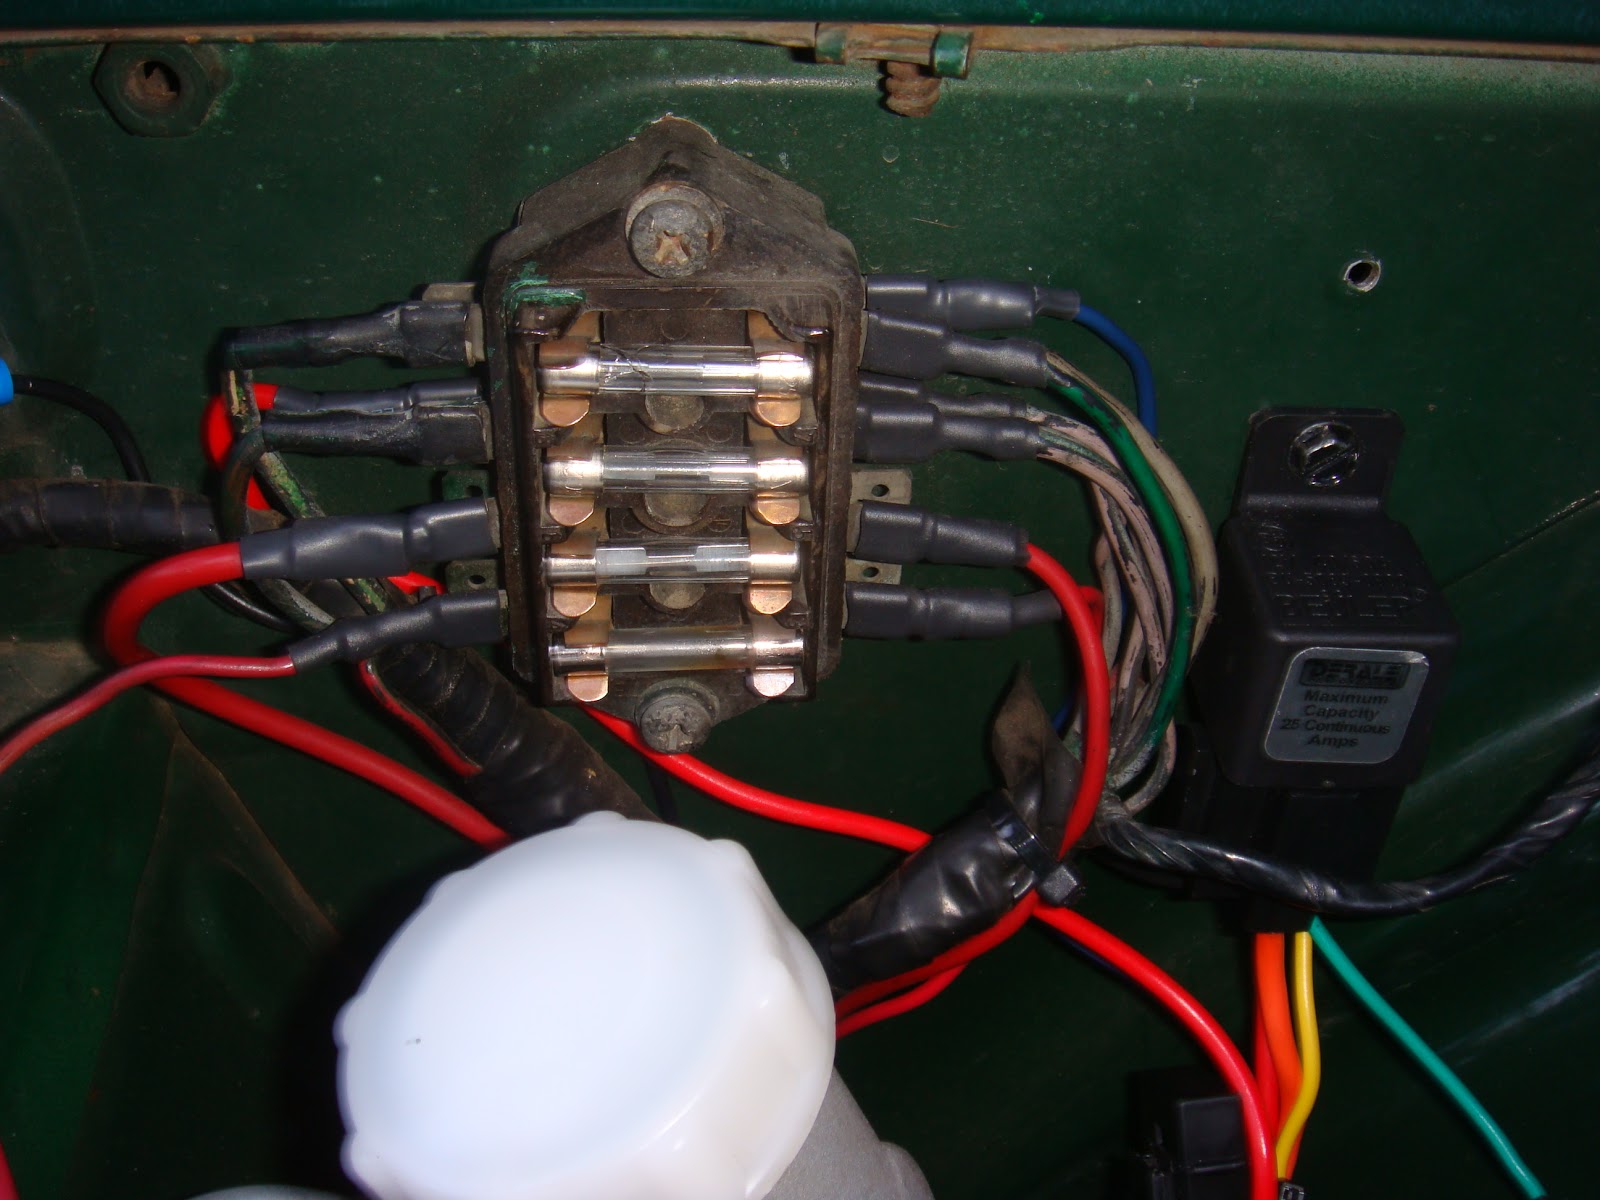
The wiring went in pretty well. I was able to tie into the original fuse box in the car to allow picking up the wiring which was electrified when the key was on and the wiring that was on all the time. I also was able to use some of the original holes in the car to mount the relay. I finished the wiring install by wrapping the harness exactly as the stock harness was wrapped, so the whole setup looks like it belongs there.


The wiring went in pretty well. I was able to tie into the original fuse box in the car to allow picking up the wiring which was electrified when the key was on and the wiring that was on all the time. I also was able to use some of the original holes in the car to mount the relay. I finished the wiring install by wrapping the harness exactly as the stock harness was wrapped, so the whole setup looks like it belongs there.


I thoroughly tested the system after installation and everything went really well. I installed a 180 degree thermostat and the system performs perfectly. It cycles exactly as expected and the car runs at a perfect temperature all the time. It also handled the 100 plus degree summer in Memphis with no issues.
Sunday, September 30, 2012
Cooling System Refurb Continued
So where I left off with the Cooling System, my radiator was at the radiator shop being boiled out and soldered up where it had a leak.
Unfortunately, I got a call from the shop and they asked me to come in. When I got there, they had the radiator off to the side. Boiled out, but obviously not soldered up. They basically told me that it had a header leak, and because it was a 40 year old radiator, they would not solder it up. They offered to re-core it for $400, but a new rad is only $260, so I said no thanks and went on my way.
When I got home, I had to figure out how to seal the radiator. I had read that using a vacuum to pull the epoxy into the joint would make the repair much stronger. Talking with a buddy who works on vintage Volvos confirmed that this repair could work.
With all that in my mind, I pulled out the automated vacuum pump I built a few years ago for building composite airplane parts. I sealed up the radiator and then hooked up the pump system and pulled a vacuum. I could hear the leak 'sucking'.
I worked up a batch of JBWeld and spread it around the leaking area. I could actually hear the epoxy being pulled into the leak and then there was silence! After letting the epoxy cure overnight, I pulled a vacuum against the radiator and it held for several minutes. Definitely a successful repair.

Next up, I needed to install the fan on the radiator. I used some self tapping screws to mount the fan to the outer edges of the radiator shroud. This is a definite measure twice, drill once type of job....

With the fan mounted to the radiator, it was time to install the whole assembly back in the car. The fan motor did not clear the frame crossmember. I elongated the holes in the radiator braces to get the fan motor off the crossmember, but will eventually make new longer braces to pull it completely off the crossmember.

To be continued......
Thursday, September 20, 2012
Too Busy To Post!
Well, I've been too busy to post much lately, but that is definitely a good thing!
I've had several projects brewing for quite some time, and finally, I've had time to knock some of them out.
The first project was a re-working of my cooling system.
I was really wanting to install an electric cooling fan on my '73, but had not had the time. I was also interested in flushing my cooling system, getting a leak in the radiator soldered closed and then putting the whole thing back in much better shape than it came out.
After getting all the right parts together - Electric fan (16") and thermostatic switch, new hoses, and fan eliminator kit, I was ready to go.
I started by pulling out the radiator. Came out easily and I managed to not make much of a mess either.

As soon as I got the radiator out, I took it straight to a radiator repair shop to be boiled out and soldered up where I knew it had a leak.
Next up, I pulled out the old fan. It came out really easily, first by removing the fan, then the puck it mounts to, and finally the fan extension. I expected the extension bolt to be very difficult, but it popped right out.
 With the fan extension off, I was able to install the Fan Eliminator kit. Doing this eliminates 6 or 7 pounds of metal and plastic from the end of the crankshaft. The supposed result according to the collective wisdom of the internet forums is that this is good for approximately 6 horsepower on the dyno- Sounds good to me!

 Unfortunately, the radiator shop was not able to complete my radiator as expected, so I went to work changing out the hoses and painting everything I could. The paint work in the front of the car makes all the difference in the world and ensures it won't begin rusting again for at least a while. While I was in there, I also took the time to replace the fan belt.
A few days later, I got a call from the radiator shop and they had bad news. They said they found the leak, but refused to solder it closed for me. They did offer to re-core the radiator however for $400! That is $125 more than a brand new radiator, so I picked up my freshly cleaned, but leaking radiator and headed home.
To be continued........
I've had several projects brewing for quite some time, and finally, I've had time to knock some of them out.
The first project was a re-working of my cooling system.
I was really wanting to install an electric cooling fan on my '73, but had not had the time. I was also interested in flushing my cooling system, getting a leak in the radiator soldered closed and then putting the whole thing back in much better shape than it came out.
After getting all the right parts together - Electric fan (16") and thermostatic switch, new hoses, and fan eliminator kit, I was ready to go.
I started by pulling out the radiator. Came out easily and I managed to not make much of a mess either.

As soon as I got the radiator out, I took it straight to a radiator repair shop to be boiled out and soldered up where I knew it had a leak.
Next up, I pulled out the old fan. It came out really easily, first by removing the fan, then the puck it mounts to, and finally the fan extension. I expected the extension bolt to be very difficult, but it popped right out.


A few days later, I got a call from the radiator shop and they had bad news. They said they found the leak, but refused to solder it closed for me. They did offer to re-core the radiator however for $400! That is $125 more than a brand new radiator, so I picked up my freshly cleaned, but leaking radiator and headed home.
To be continued........
Saturday, September 1, 2012
OVERDRIVE!!!!!
In an earlier post, I mentioned working on the J Type Overdrive in my TR6. It was jumping in an out of overdrive rapidly, and without any circumstance (like a pothole) which would cause an electrical disconnection.
I topped up the oil in the gearbox/OD unit which was low. I also checked all the electrical connection, none of which were loose. Unfortunately, when I did the work, it was not driveable for other reasons, so I could not test it.
Well, late Friday night, I finally got it driveable again and I was able to find out if my fix worked --- Success. The fix worked very well. No popping in and out of overdrive repeatedly.
Interestingly enough, when I was in the process of making the fix, I talked to my father about it and he remembered that low oil in the transmission would cause just the problem I had back in the early 80's with his '74 TR6.
Sunday, August 26, 2012
No News Is Good News - Right?
So, its been over a month since my last post. Since that time, I've been enjoying the TR a good bit. Lots of driving to work and to the pizza place, and generally anywhere my little girl wants to go. Its a lot of fun having someone else as excited about riding in the TR as I am!
However, things have not been perfect in gearbox and overdrive land. about 3 weeks after my last post, the overdrive began jumping in and out of gear again. However this time, it was not when hitting a bump, and tapping on the switch lever had no effect on the problem.
That leads me to believe the problem is elsewhere. Once again, I checked all the leads, and the lead to the solenoid connection was somewhat loose. To remedy that, I tightened the connector with a pair of pliers and reconnected it. After that, I checked the gearbox oil level.
My theory on the oil is this - the Laycock J overdrive is hydraulically actuated via a pump which picks up gearbox oil from the bottom bottom of the gearbox. It then pumps that oil at around 4-500 lbs/in pressure to drive a mating pressure plate which causes the overdrive sun gear and planetary gears to spin.
Back to the theory- If the oil pressure is low, then the pump will cavitate and pump a small bit of air into the piston system and the pressure plate will jump out of the locked position. Needless to say this 'in-out-in' cycle is hard on the overdrive to say the least and not something I want to continue.
So, while I was tightening the connections on the overdrive solenoid, I checked the transmission fluid oil level, and sure enough, it was low. It took approximately 1/3 quart to top it up and I think it overdid it just a little bit. While I mention this, I should say something about oil plugs.
#1 Don't overtighten them. They have a tapered fit, and overtightening them widens the hole just a fraction each time.
#2 The best wrench to put on one is a square socket on a ratchet wrench.
#3 Failing that you have the right square socket, a 7/16" box end wrench.
#4 See #1
I have the car in the air on stands for another couple days, so it will be a couple days to say if this works.....
Subscribe to:
Posts (Atom)